Practice API automation
This REST application written in Python was built to help testers learn to write API automation. The application has endpoints for you to practice automating GET, POST, PUT and DELETE methods. We have also included permissioning and authentication too. This web application was developed by Qxf2 Services.
Note: You can look at the username/password combinations in the user_list variable in this file.
Setup
We recommend you get setup with this application locally as it is a good opportunity for you to get some practice setting up a simple Flask application. It's easy and takes less than 15-minutes for absolute beginners to get setup. So, don't worry!
- In your terminal prompt, pip install flask
- If you know git, git clone https://github.com/qxf2/cars-api.git
- If you don't know git, copy the contents of this file and save it (anywhere) as cars_app.py
- In your terminal prompt, cd directory_that_has_cars_app_py
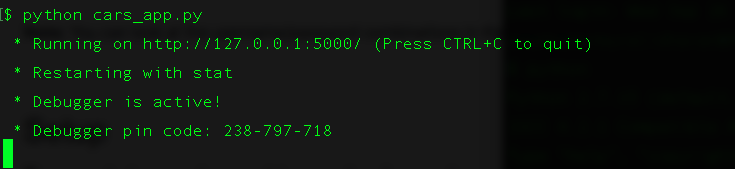
- In your terminal prompt, python cars_app.py
API endpoints and examples
This section lists the API endpoints present. It also lists the call you would make with Python's requests library. To follow along, please run python cars_app.py in one terminal prompt. Then, in a new terminal prompt, pull up your Python interpreter (by typing python) and import requests. Then, follow along by running the commands below in your Python interpreter.
1. GET
a) /cars: Get a list of cars
response = requests.get(url='http://127.0.0.1:5000/cars',auth=(username,password))
b) /users: Get the list of users
response = requests.get(url='http://127.0.0.1:5000/users',auth=(username,password))
c)
/cars/filter/<%car_type%> : Get the list of users
response = requests.get(url='http://127.0.0.1:5000/cars/filter/hatchback',auth=(username,password))
d) /register : Get registered cars
response = requests.get(url='http://127.0.0.1:5000/register',auth=(username,password))
e) /cars/<%name%> : Get cars by name
response = requests.get(url='http://127.0.0.1:5000/cars/Swift',auth=(username,password))
2. POST
a) /cars/add: Add new cars
response = requests.post(url='http://127.0.0.1:5000/cars/add',json={'name':'figo','brand':'Ford','price_range':'2-3lacs','car_type':'hatchback'},auth=(username,password))
🤔 How do you verify that your post did change data on the server? One effective way is to keep track of the cars that were present before you added a new car. And then look at the cars that are present after you added a new car. So try:
#Cars present before you add a new car
response = requests.get(url='http://127.0.0.1:5000/cars',auth=(username,password))
cars_before_add = response.json()
print(f'Cars present before adding a new car: {cars_before_add}')

#Make the POST to add a new car
response = requests.post(url='http://127.0.0.1:5000/cars/add',json={'name':'figo','brand':'Ford','price_range':'2-3lacs','car_type':'hatchback'},auth=(username,password))

#Cars present after you added a new car
response = requests.get(url='http://127.0.0.1:5000/cars',auth=(username,password))
cars_after_add = response.json()
print(f'Cars present after adding a new car: {cars_after_add}')
😲 ... the cars present before you added a new car and the cars present after you added a new car seem identical! What happened?
💡 Maybe the Cars App is using sessions? So each request is treated as a new session and the POST does not affect the next GET. Luckily for us, Python's requests module makes it easy to create a session. You simply have to try:
#Create a session
my_session = requests.Session()

#⭐ KEY CHANGE: Now use my_session.blah() wherever you were using requests.blah()

#Cars present before you add a new car
response = my_session.get(url='http://127.0.0.1:5000/cars',auth=(username,password))
cars_before_add = response.json()
print(f'Cars present before adding a new car: {cars_before_add}')

#Make the POST to add a new car
response = my_session.post(url='http://127.0.0.1:5000/cars/add',json={'name':'figo','brand':'Ford','price_range':'2-3lacs','car_type':'hatchback'},auth=(username,password))

#Cars present after you added a new car
response = my_session.get(url='http://127.0.0.1:5000/cars',auth=(username,password))
cars_after_add = response.json()
print(f'Cars present after adding a new car: {cars_after_add}')
😎 Now, you see that the car you have added did indeed get added! From now on, it is recommended you start using a session to interact with the app. This is especially true if you are going to be performing actions that change data (a.k.a non-idempotent actions) of the application.
b) /register/car: Register a car
response = requests.post(url='http://127.0.0.1:5000/register/car',params={'car_name':'figo','brand':'Ford'},json={'customer_name': 'Unai Emery','city': 'London'},auth=(username,password))
Question: How do you verify that the registration happened correctly?
3. PUT
a) /cars/update/<%name%>: Update a car
esponse = requests.post(url='http://127.0.0.1:5000/cars/add',json={'name':'figo','brand':'Ford','price_range':'2-3lacs','car_type':'hatchback'},auth=(username,password))
4. DELETE
a) /cars/remove/<%name%>: Delete a car
response = requests.delete(url='http://127.0.0.1:5000/register/cars/remove/City',auth=(username,password))
b) /register/car/delete: Delete first entry in car registration list
response = requests.delete(url='http://127.0.0.1:5000/register/car/delete',auth=(username,password))